Sunday, September 16, 2012

Upcycled Chair


I bought this great plywood chair at the local op shop for $10 -  I and am rejuvenating it as part of project I am working on with a client.  The chair will be used as the desk chair in a 10year old boys room.


After a sand, a couple of coats of paint and some personalisation - I have stenciled his initial on the front and back.  A very funky chair for $15.00


Today reading the Sunday paper there was a feature on butterfly chairs from Temptation Design  - these chairs retail for $545 each!!! ouch


Although the shape is a little different, they do look similar and I think my $15 upcycled chairs is a knock out!


Monday, September 3, 2012

Upholstery - the finished product

I know its taken me a little while to update my progress reupholstering my two chairs - time just got away.  The last few weeks have gone so fast and I have been so focused on getting both chairs finished at the same time, that I didn't have time to update my blog.  But I am here now...would you like to see the finished product.


This where i last left off....the front and seat had been completed....
If you look close you can see the buttons


 The contrasting back fabric and handmade piping trim

The finished product - isn't this so sweet....!  

My next project will be an ottoman so stay tuned

Cheers

Vicki

Sunday, August 5, 2012

Uphostery - New look new life - Part 2

My little project to bring new life to these little gems is progressing well.  After 3 weeks, the removal of countless staples, removal of old stuffing (aka as flock), new wadding, springs and the restuffing process the chairs are coming along very nicely.    I was amazed at how taught you need to get the the hessian and calico, all while trying to hammer in the tacks...truly and art......

Here are some progress pics.   This week will see the beginning of adding the fabric...very excited.


poor little chair is just about totally naked...suprising what is underneath all the fabric - not much at all


Getting back into shape - new wadding and springs...very well secured but it took some time t get them just right....

starting to get dressed


                                                              getting stuffed!!!!


Petticoat on - getting ready for the final dressing and zushing!!!!! 


Monday, July 23, 2012

Upholstery ……New look – New life part 1


I am so excited as last night I started a course I have wanted to do for ages……UPHOLSTERY….I especially wanted to do this as I bought these (2) wonderful little chairs at St Vinnies – they were an absolute bargain.  They are in great condition, think around from 1950’s but need a new fresh exciting look.  

Another reason I have wanted to do an upholstery course is that I love watching Sarah Richardson and some of the things she has done is out of this world.   I also wanted to start making upholstered bed heads and reupholster piece for others…..

I have found a fabulous course held at Padghams in East Moorabbin, so for the next eight weeks every Tuesday night is Padgham night…last night was fun and the class is all women. I must say we were all pretty focused in our task and there wasn’t a lot of chatter happening. I’m sure that will change over time. Adrian and Dianne that run the class are brilliant.


Last night was stripping back our chairs so that we can start to rebuild them and make them look wonderful.   I, like all the ladies in class never knew that an upholstered chair has so many staples and tacks, there seemed to be no end in sight.  It had to be the quickest two hours of my life, but I am glad to say that after two hours of lots of hammering, pulling out staples and some help from Adrian I am nearly there……..This is what my chair looks like now  – not so pretty, but in a few weeks time that will all change!!  


I am going to use two fabrics in the chair, one is a large multi coloured paisley/floral (for the front of the chair) and on the back I will use a complimentary stripe – aren’t these just fabulous.  


 Stay tuned for next weeks installment

Sunday, July 8, 2012

Cleaning Candle Jars


Are you like me and love the scent of candles burning around the house.  Candles today come in all types of wonderful containers and if like me you buy quality long burning candles  - they are not cheap.

So what can you do with the containers - throw they out - such a waste.  Why not clean them and then reuse them for other purposes - hold cotton balls, buds, paper clips.  New uses are only limited to your imagination...

Let's get started cleaning your containers.  Supplies:
  • used candle jar,
  • freezer,
  • blunt knife,
  • old newspaper,
  • paper towel,
  • vinegar.


Place used candle jar in the freezer for approximately 1 hour to harden the soy wax.

Remove candle from the freezer and with a blunt knife remove excess wax from the bottom and sides of the candle jar.

Empty container of any excess candle wax.


Take clean paper towel and wipes inside of container to remove any wax residue and soot from the container.

Once the jar has been wiped clean, place some white vinegar on a clean paper towel and white all surfaces inside and out to remove any sticky residue.

Lastly, place the container in sink of warm soapy water and thoroughly clean.


Rinse and dry the containers and you are now ready to reuse them......

Sunday, July 1, 2012

Chevron Art

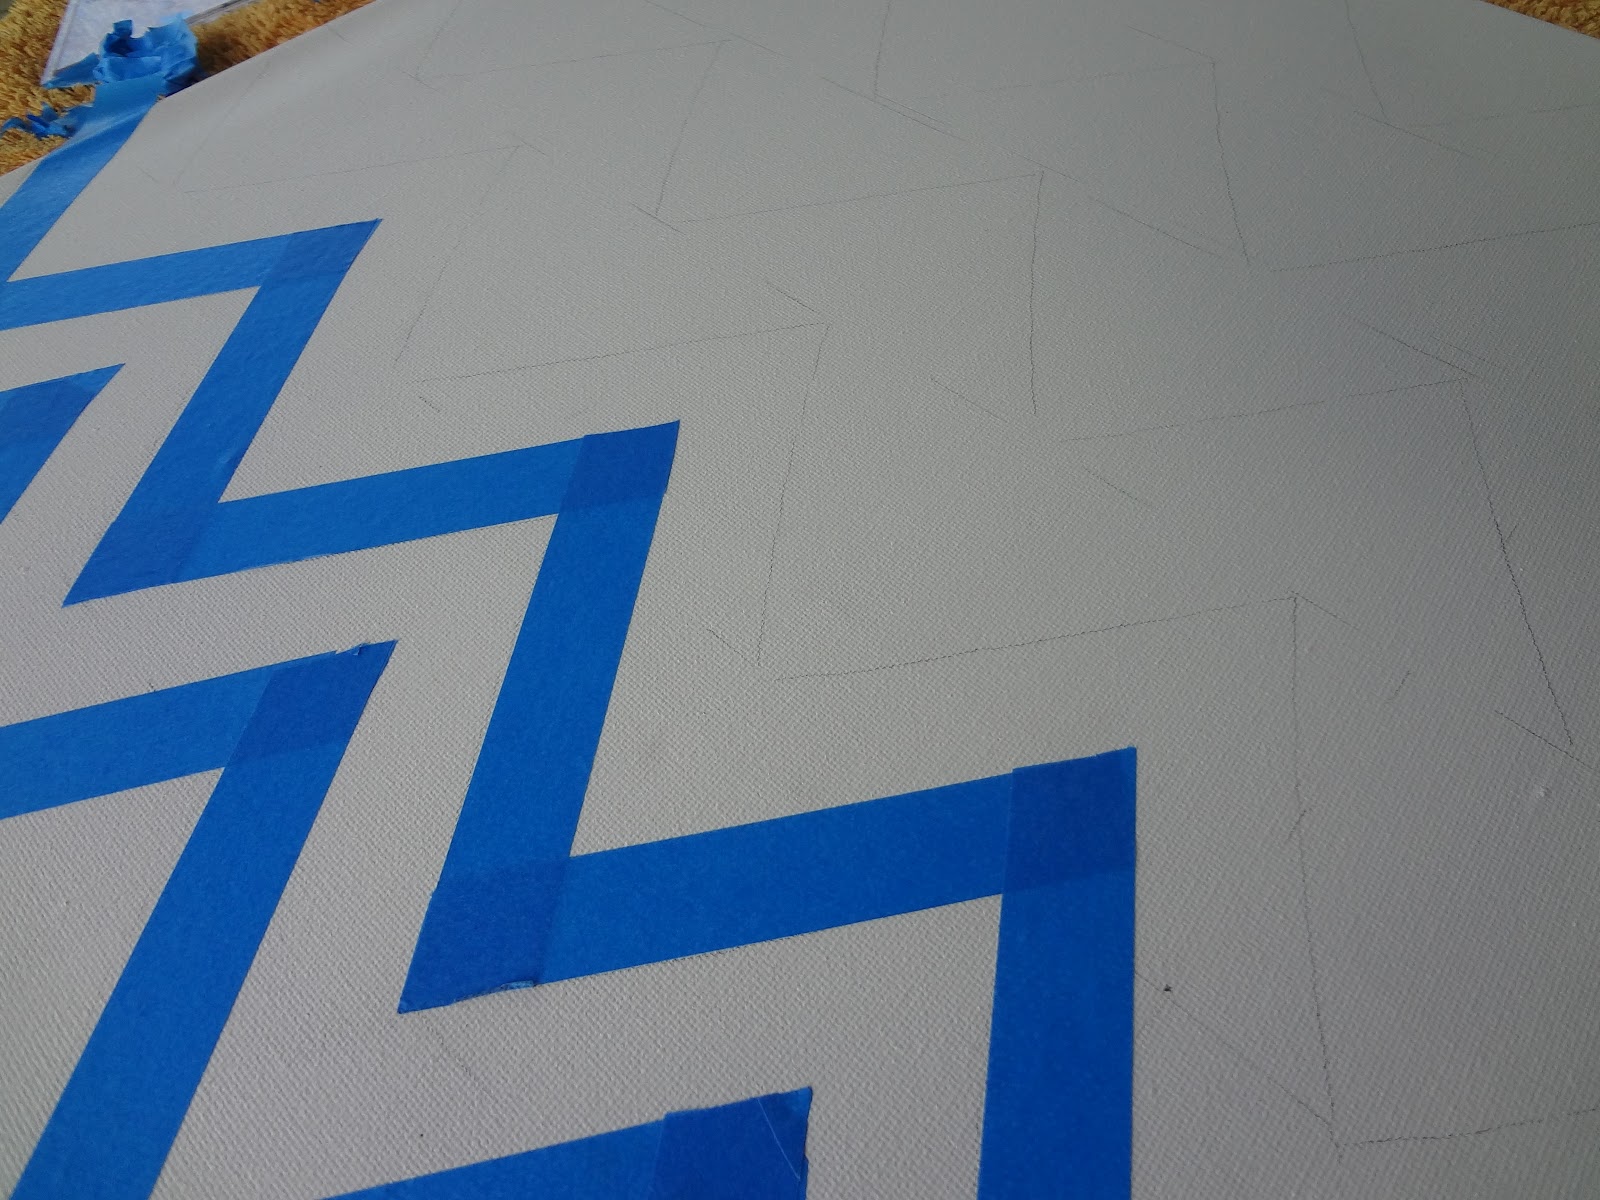
I love the clean lines of the chevron design and wanted to include a piece at home.  Here is how I made my Chevron canvas.

Step 1


A plain canvas with a coat of white acrylic paint.


Step 2 

Divide the canvas into even sections - I divided the canvas into 8 (horizontal)  I then cut out triangle template.

Trace the template across each of the lines.


 Step 3

Using painters tape, start to create the lines that will transform into the Chevron pattern.


I found the easiest way to get a clean sharp point is to overlap the tape at each point.


  Using the outline of the tape  - trim the tape to create a clean sharp point.

Step 4 - Now for the fun stuff 

I wanted to create a bright multi coloured chevron canvas and used a range of acrylic paint colours that i picked up from the Reject Shop for $4...

now start painting...  randomly apply the different colours.

Don't be afraid to overlap the colours. The canvas completely covered with paint. 

Step 5 

Let the paint dry and slowly remove the tape.......to reveal an original piece of art.. 


The finished product


Tuesday, May 8, 2012

Two Ways to Sell


You have decided to sell your home and have agreed a price of $450,000 with your agent.   Your agent has a commission of 5% - based on $450,000 they will receive a commission of $22,500, leaving you with $427,500 after commission, but before costs.

You love your house however; decide that you don’t want to spend any money on preparing it for sale as you believe although a needing some work it will sell relatively quickly (within 6 weeks), plus the new owner can update the house to suit them.  

Fast forward three and half months, the market has slowed and you still have not sold.  You have reduced your asking price to $425,000.   Feedback from open homes has been that work is needed on the house compared to other homes at $425,000 – even after you have reduced the price.  You are adamant that you will not reduce your price further even though your agent is suggesting you should.

Did you know that since putting your house on the market:
  • You have paid $6800 on mortgage repayments
  • $1500 in outgoings
  • 14 weekends interrupted by open homes
  • Had increased stress because you haven’t sold
  • Forgone $25,000 in your sale price, and
  • Your agent has only reduced their commission by $1,000 at your current price of $425,000.  

Long Sale - Home not staged
(min 3.4 months)         
Asking Price
$425,000
Less

Mortgage payments
$6,800
Outgoings
$1,500
Commission
$21250


Subtotal
$29,555
Net Profit $395,450

If you don’t get an offer this month, your costs will increase and your profit will decrease, particularly if you reduce your price again.  Not a good situation.


Now consider the alternative.   You decide when listing your home for sale to get some assistance in preparing your it for sale and engage a Home Stager at a cost of $2,000[1].    The original asking price stays at $450,000 and the property sells in 6 weeks.  


Quick Sale  - Staged Home       
(6 weeks)         
Asking Price
$450,000
Less

Mortgage payments
$3,400
Outgoings
$750
Commission
$22,500
Staging Costs
$2,000
Subtotal
$28,650
Net Profit     $421,350

What a result, you have made an additional $25,900 in profit – reduced your stress levels and sold your home in half the time!!   

HomeStaging does make a difference.  If you would like find out more, call Décor Interior Style on 0430 195 940 and ask for Vicki.


[1] This is an indicative price only, the actual cost will depend on the condition of the house, work required and if hire furniture is needed.